PostgreSQLをWSL Ubuntu上にinstallし,windows上で起動したSQLツールから接続する手順
目次
Install
- PostgreSQL: Linux downloads (Ubuntu)
- とほほのPostgreSQL入門
- WSLで構築したUbuntuにpostgresSQLをインストールする方法と初期設定 #PostgreSQL – Qiita
- UbuntuでPostgreSQLを起動してアプリケーションで使える状態にする – 作記録
$ sudo apt install postgresql

# 起動状態確認
$ sudo service postgresql status
# stopしていたら起動させる
$ sudo service postgresql start

# PostgreSQLにアクセス
$ sudo -u postgres psql
postgres=#
ユーザーの追加
# ユーザーharibを追加する場合
postgres=# CREATE USER harib;
CREATE ROLE

# ユーザー権限を追加
postgres=# ALTER ROLE harib CREATEDB;
ALTER ROLE

# パスワードも設定
postgres=# ALTER USER harib WITH PASSWORD 'hogehoge';
ALTER ROLE

# 確認
postgres=# \du
                             List of roles
 Role name |                         Attributes
-----------+------------------------------------------------------------
 harib     | Create DB
 postgres  | Superuser, Create role, Create DB, Replication, Bypass RLS

postgres=# \q

# 作成したユーザーでログインできることを確認
$ psql -U harib postgres
Password for user harib: # パスワードを入力(pg_hba.confの設定によってはスキップされる)
postgres=>
データベースの作成
動作確認用に試しに単純なデータを投入してみる.
postgres=> CREATE DATABASE sample_db;
CREATE DATABASE

# データベースの一覧表示
postgres=> \l
                                                     List of databases
     Name     |  Owner   | Encoding | Locale Provider | Collate |  Ctype  | ICU Locale | ICU Rules |   Access privileges
--------------+----------+----------+-----------------+---------+---------+------------+-----------+-----------------------
 django_basic | harib    | UTF8     | libc            | C.UTF-8 | C.UTF-8 |            |           |
 postgres     | postgres | UTF8     | libc            | C.UTF-8 | C.UTF-8 |            |           |
 sample_db    | harib    | UTF8     | libc            | C.UTF-8 | C.UTF-8 |            |           |
 template0    | postgres | UTF8     | libc            | C.UTF-8 | C.UTF-8 |            |           | =c/postgres          +
              |          |          |                 |         |         |            |           | postgres=CTc/postgres
 template1    | postgres | UTF8     | libc            | C.UTF-8 | C.UTF-8 |            |           | =c/postgres          +
              |          |          |                 |         |         |            |           | postgres=CTc/postgres
(5 rows)

# データベースを切り替え
postgres=> \c sample_db;
You are now connected to database "sample_db" as user "harib".

# テーブル一覧を表示
sample_db=> \dt
Did not find any relations.
sample_db=> CREATE TABLE table01 ( id text, name text );
CREATE TABLE
sample_db=> \dt
        List of relations
 Schema |  Name   | Type  | Owner
--------+---------+-------+-------
 public | table01 | table | harib
(1 row)

# テーブルにデータを追加
sample_db=> INSERT INTO table01 ( id, name ) VALUES ( 'abc123', 'Alice' );
INSERT 0 1
sample_db=> INSERT INTO table01 ( id, name ) VALUES ( 'abc456', 'Bob' );
INSERT 0 1
sample_db=> select * from table01;
   id   | name
--------+-------
 abc123 | Alice
 abc456 | Bob
(2 rows)
WindowsのSQLツールから接続
HeidiSQL, A5:SQL Mk-2などのツールをWindowsで立ち上げ,WSL上のPostgreSQLに接続
LinuxディストリビューションのIPを特定
参考:WSL を使用したネットワーク アプリケーションへのアクセス | Microsoft Learn
windowsのpowershell上で以下のコマンドを実行し,起動中(STATEがRunning)のwslの名称を確認
> wsl --list --verbose
  NAME                   STATE           VERSION
* docker-desktop-data    Stopped         2
  Ubuntu                 Stopped         2
  Ubuntu-20.04           Stopped         2
  docker-desktop         Stopped         2
  Ubuntu-24.04           Running         2
対象のwslのIPアドレスを確認
> wsl -d Ubuntu-24.04 hostname -I
172.23.70.41
クライアント認証の設定変更
WindowsからはTCP/IPでの接続をするため,PostgreSQLのクライアント認証のファイル(pg_hba.conf)を修正する.
参考
pg_hba.confは/etc/postgresql/<version>/main/にある.
$ cd /etc/postgresql/16/main/
$ sudo vi pg_hba.conf
以下のようにすべてのhost接続をscram-sha-256で行う方式に設定
local   all             postgres                                peer
local   all             all                                     scram-sha-256
host    all             all             all                     scram-sha-256
local   replication     all                                     peer
設定を反映するため,PostgreSQLを再起動
$ sudo service postgresql restartSQLツールの接続
上記で新規作成したユーザーでデータベースにアクセスしてみる.
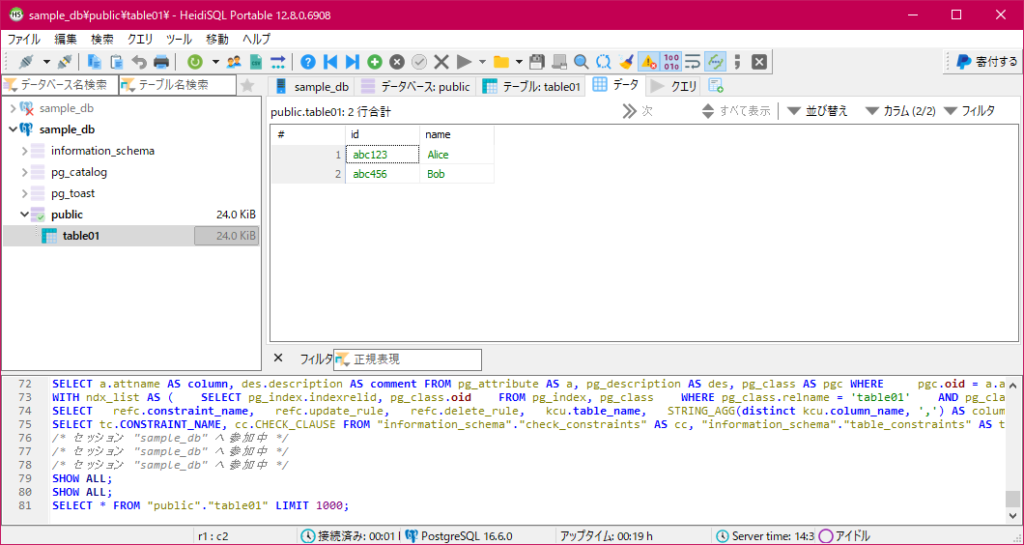
HeidiSQL
セッションマネージャーの画面で以下のように設定し,開くボタンを押すとアクセスできる.

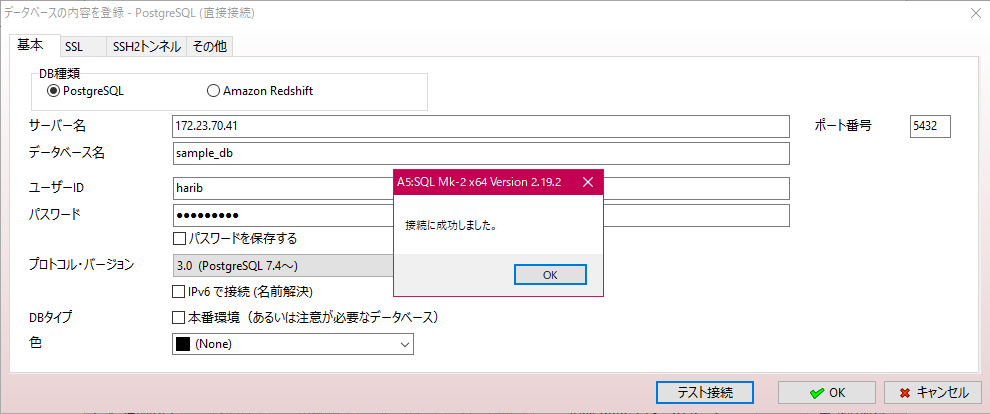
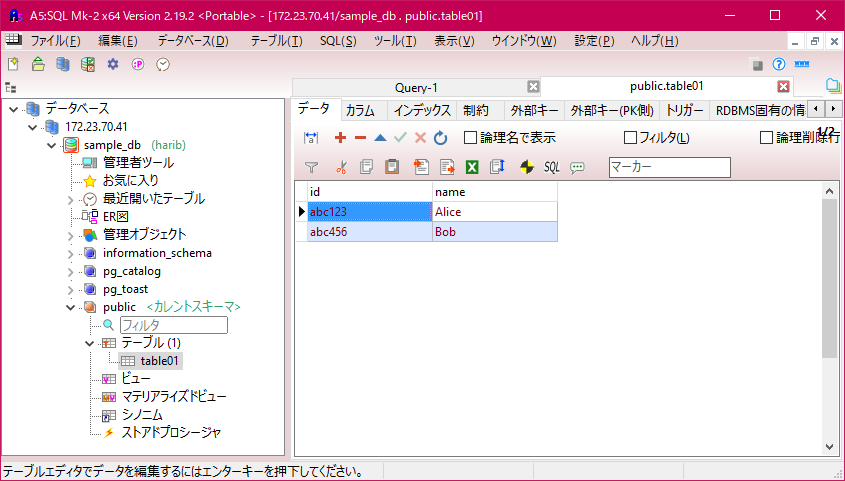
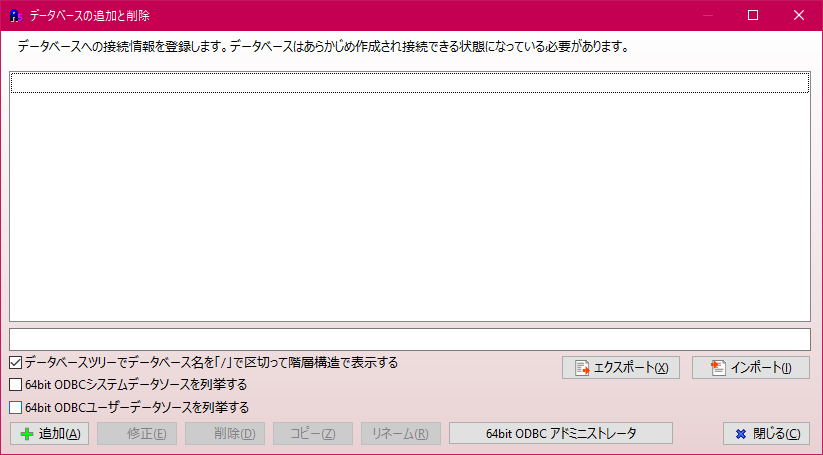
A5:SQL Mk-2
メニューと「データベース」>「データベースの追加と削除」で左下の追加ボタンを押す.
接続タイプの選択でPostgreSQL(直接接続)を選択

以下のように上記で設定・取得した値を入れて,テスト接続をクリックし,問題なければOK.